Is your gravel path a bit dull for welcoming guests? Or do you have a lawn you’d like to make more usable, perhaps by creating an outdoor seating area? In this video and guide, we'll show you step by step how to fit and lay crazy paving in loose materials—meaning directly on the ground and not on a concrete slab. This way, you can create a cozy corner for a coffee break or a beautiful, maintenance-free entranceway.
What you need
The first step when laying slate directly on the ground is to measure the area and calculate the amount of slate you’ll need.
Measure the area where you want to lay the slate.
Add some extra material for waste due to trimming. How much extra you need depends on how much shaping you plan to do, but a good rule of thumb is to add about 20 %.
Check this video/guide for more on how to calculate the amount of slate depending on the desired level of customization.
Once you’ve measured, ordered, and received your slate, it’s time to lay down a gravel base.
Spread a layer of gravel about 5 cm thick, with a particle size of 4 – 8 mm for stability and drainage.
Level it out with a rake and ensure a slight slope in the desired direction to avoid puddles forming on the surface.
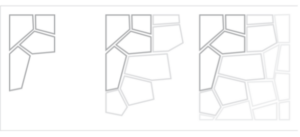
With the base ready, it’s time to plan the layout of the slate pieces.
Lay out many of the slate pieces to get a sense of the selection.
Choose any particularly large or beautiful pieces and plan to use them in prominent spots without much trimming. Ideal spots include areas under a grill or directly in front of the door. Also, place the heaviest stones along the edges for extra stability.
Ensure the area is sloped so water drains away. Start laying slate from the highest point, which is often in a corner, and work outward in a fan shape:

Start with one of the largest and thickest pieces that has the most suitable shape.
Set the piece down, tamping it into place with a rubber mallet or by using your body weight to compact the base and secure the slate. If trimming is necessary, refer to the next step.
Depending on the desired look, the slate may need more or less shaping.
Some prefer a rough, rustic look with larger gaps and more natural shapes, while others like a more refined look, requiring more shaping.

We recommend avoiding angle grinders. You’ll get a cleaner result and avoid dust and noise by using simple manual tools and methods.
Method 1: Hammer
This will give the slate a rough edge.
Mark the desired cut with chalk close to the edge.
Ensure the slate is steady and secure.
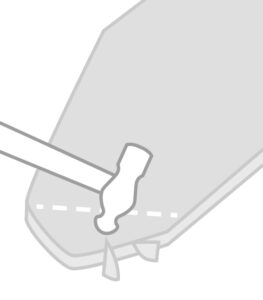
Use a ball-peen hammer to strike the slate at an angle along the break line. Work gradually until you reach the chalk line.

See the method demonstrated here–>
Method 2: Hammer and Slate Knife (or Chisel)
For a smoother, more precise edge, especially for curves or straight lines.
Mark the slate with chalk close to the edge.
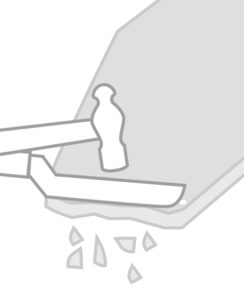
Secure the slate and use a ball-peen hammer to strike at an angle, gradually working toward the chalk line.
Use the slate knife to fine-tune the edge along the chalk mark.

See the method demonstrated here –>
Creating a Right-Angle Edge:
For a clean, right-angle edge, use a technique called “hewing”
Mark a line with a scribe or similar tool, scoring 1–2 mm deep.
Make corresponding marks on the back side.
Use a chisel and hammer along the mark until the slate splits along the line.

Once all the slate pieces are in place, the final step is to fill the joints.
Watch this video/guide for inspiration on 5 different joint-filling options for slate laid in gravel. Depending on the joint size and desired look, the joints can be filled with materials like soil and grass seeds, sedum plants, or gravel—the most common choice.
Press the gravel firmly into the joints and brush off the excess.
Tip: Reuse any leftover slate trimmings as “slate mulch” in flower pots or garden beds. Slate mulch doesn’t steal nutrients from the soil, stores heat, and enhances plant growth—and it’s decorative too!
Good luck with your project—you’ve got this! If you have any questions, feel free to reach out for further assistance.