Here, we demonstrate how to lay large crazy paving. These slabs are perfect for everything from mountain cabins and natural gardens to seaside cottages and urban gardens (often used as stepping-stone paths). Each slab covers between ½ – 1 square meter and is 4 to 6 cm thick.
What you need:
While heavy and a bit challenging to handle, with proper lifting techniques, the “slate dance,” and a few handy tips, you’ll succeed and enjoy these benefits:
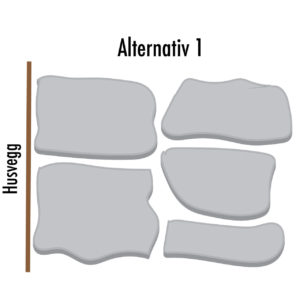
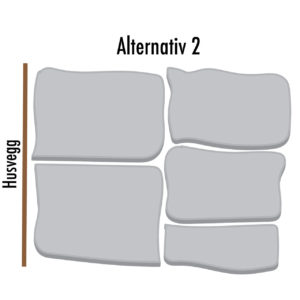
There is little to no waste if you don’t cut the slate. For rough adjustments (option 1), add about 5 % extra, and for finer adjustments (option 2), about 10 % extra.
A 10 cm layer of gravel is sufficient under normal conditions, with extra to level thinner slabs. 8/16 mm gravel works well for drainage.

Minimal adjustment creates gaps of 5 – 15 cm, which can be filled with gravel, sand, stone chips, river stones, soil, or grass seed.

A higher degree of customization for a cleaner look results in joints between 2–5 cm, which can be filled with materials like subbase/sand, soil, and grass seeds.
Check out 5 different joint types for flagstone laid on loose material here!
Rough grade the terrain (excavator)
Add gravel
Level the gravel with a slight slope (1.5%)
Remember to leave space for the slate, stopping 60 mm below the final height
Lay out the slabs to visualize. Take time to familiarize yourself with the stone. When laying a patio, focus on the shape and placement to avoid dead ends. Always plan ahead, noting where you can place future slabs.
Measure the thickness of the first slab to gauge how much filler is needed to reach the desired level. Add filler where necessary.
To move the slabs (the “slate dance”), tilt them off the pallet using gravity and balance. Pivot the slab from side to side until you reach the placement area. Lay the slab down toward you for more control.
Trim edges for practical or aesthetic reasons using a slate knife and hammer.
Ensure the level is correct. Adjust the base if needed, then secure the slab with a rubber mallet or by stomping on it.
Check the level regularly, adding filler as necessary, and lay the next slab, shaping it to fit the adjacent one.